
What's New
We're excited to introduce Data Manager in beta, a new feature in the Datarock platform that allows you to manage your images and metadata directly within the platform. This guide serves as your complete reference for getting started with Data Manager.
If you want to participate in this beta release, please contact us at customersuccess@datarock.com.au.
Why we created Data Manager
You've told us that:
-
You need better tools to view and edit image metadata.
- You want the ability to rotate and crop images in the platform.
- You need clearer error reporting.
Data Manager addresses these needs, allowing you to handle image management tasks without leaving the platform.
Getting started with Data Manager
Where to Find It
Data Manager appears as a new tab at the beginning of your processing workflow:
- Log in to your Datarock account.
- Select your project or hole to begin.
- Look for the Data Manager tab in the main navigation (before Image Preparation).
Feature Guide
a. VIEW IMAGES, METADATA & ALERTS IN ONE PLACE:
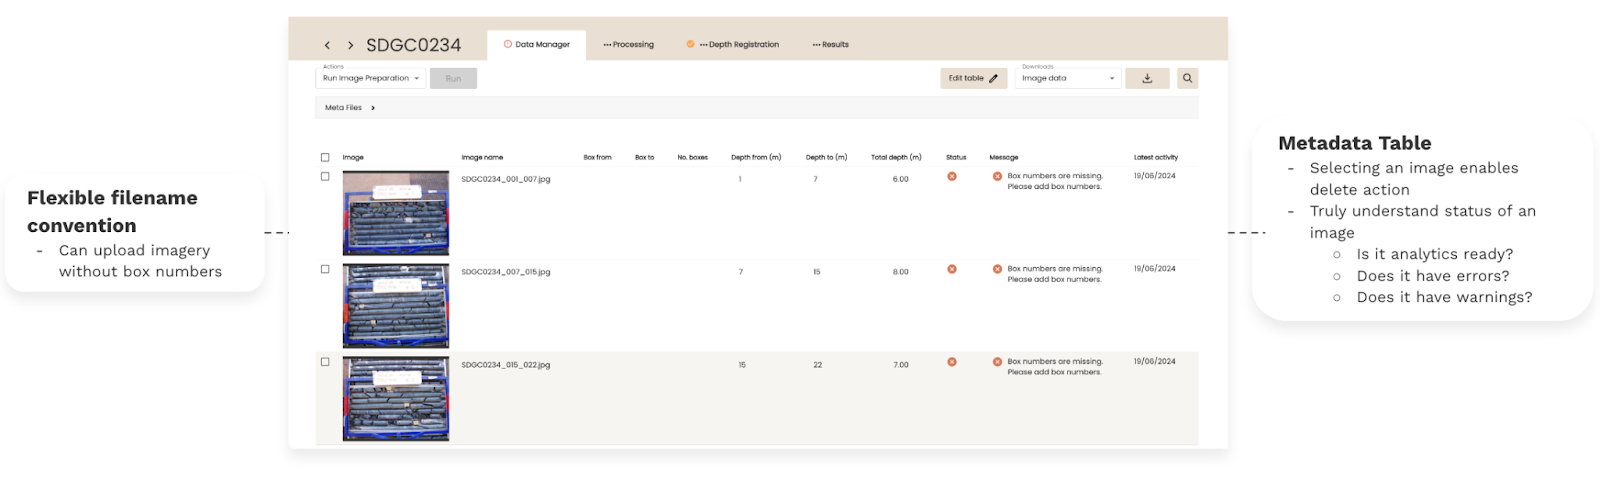
b. DELETE IMAGES:

c. EDIT IMAGE METADATA:![]()

d. ROTATE IMAGES:

e. CROP IMAGES:

f. UPDATE IN BULK: Export your data as a CSV, make your bulk edits, then re-upload the updated file.


Tips for Success
- Start small: Begin with a single hole to get comfortable with the tools- Check status indicators: Address red errors before proceeding to analysis
- Save your work: click "Save" after making changes
- Use CSV for bulk changes: When updating many images, CSV import/export will save you time
Beta Limitations
As this is a beta release, you might notice:
- Performance may slow with very large sets of images (1000+)- Some complex filenames may not be perfectly interpreted
- Other unforeseen user experience issues
We Want Your Feedback and We're Here to Help
Your experience matters to us! Let us know:
-
What’s working well
-
What could be improved
-
Any issues you’re encountering
-
Features you’d love to see
- Support needed
Please share your thoughts using the contact support form by selecting "feedback" under categories, or "technical support" instead, if you need help.